


You’re probably staring at a tub or cake right now, watching caps swell by the hour, and wondering if today is the day. That moment gets every new grower. Pick too early and the fruits feel underdeveloped. Wait too long and you get flattened caps, spore dust, and a harvest that looks a lot less clean than it did the night before.
A common piece of advice: harvest when the veil breaks. That rule is useful, but it’s not the whole story. When to pick magic mushrooms is partly a visual skill, partly a timing problem, and partly a response to the conditions in your grow space.
A good harvest comes from reading the mushroom in front of you, not from forcing every strain and every flush into one rigid rule. The veil matters. So do humidity, fresh air, CO₂, and the quirks of mushrooms that don’t behave like standard cubensis fruits. If you learn the basic signal first, then layer in the subtle cues, your harvests get cleaner and more consistent.
Harvesting Prerequisites Safety and Identification
Before harvest timing even enters the conversation, one rule comes first. Only harvest mushrooms you can identify with complete confidence, and only from a clean grow. If either piece is shaky, stop there.
That sounds strict because it should. A beginner’s biggest mistake isn’t usually picking a few hours too early. It’s assuming every fruit in the tub is safe because most of it looks normal. Contamination doesn’t care how long you spent colonizing grain. Misidentification doesn’t reward optimism.
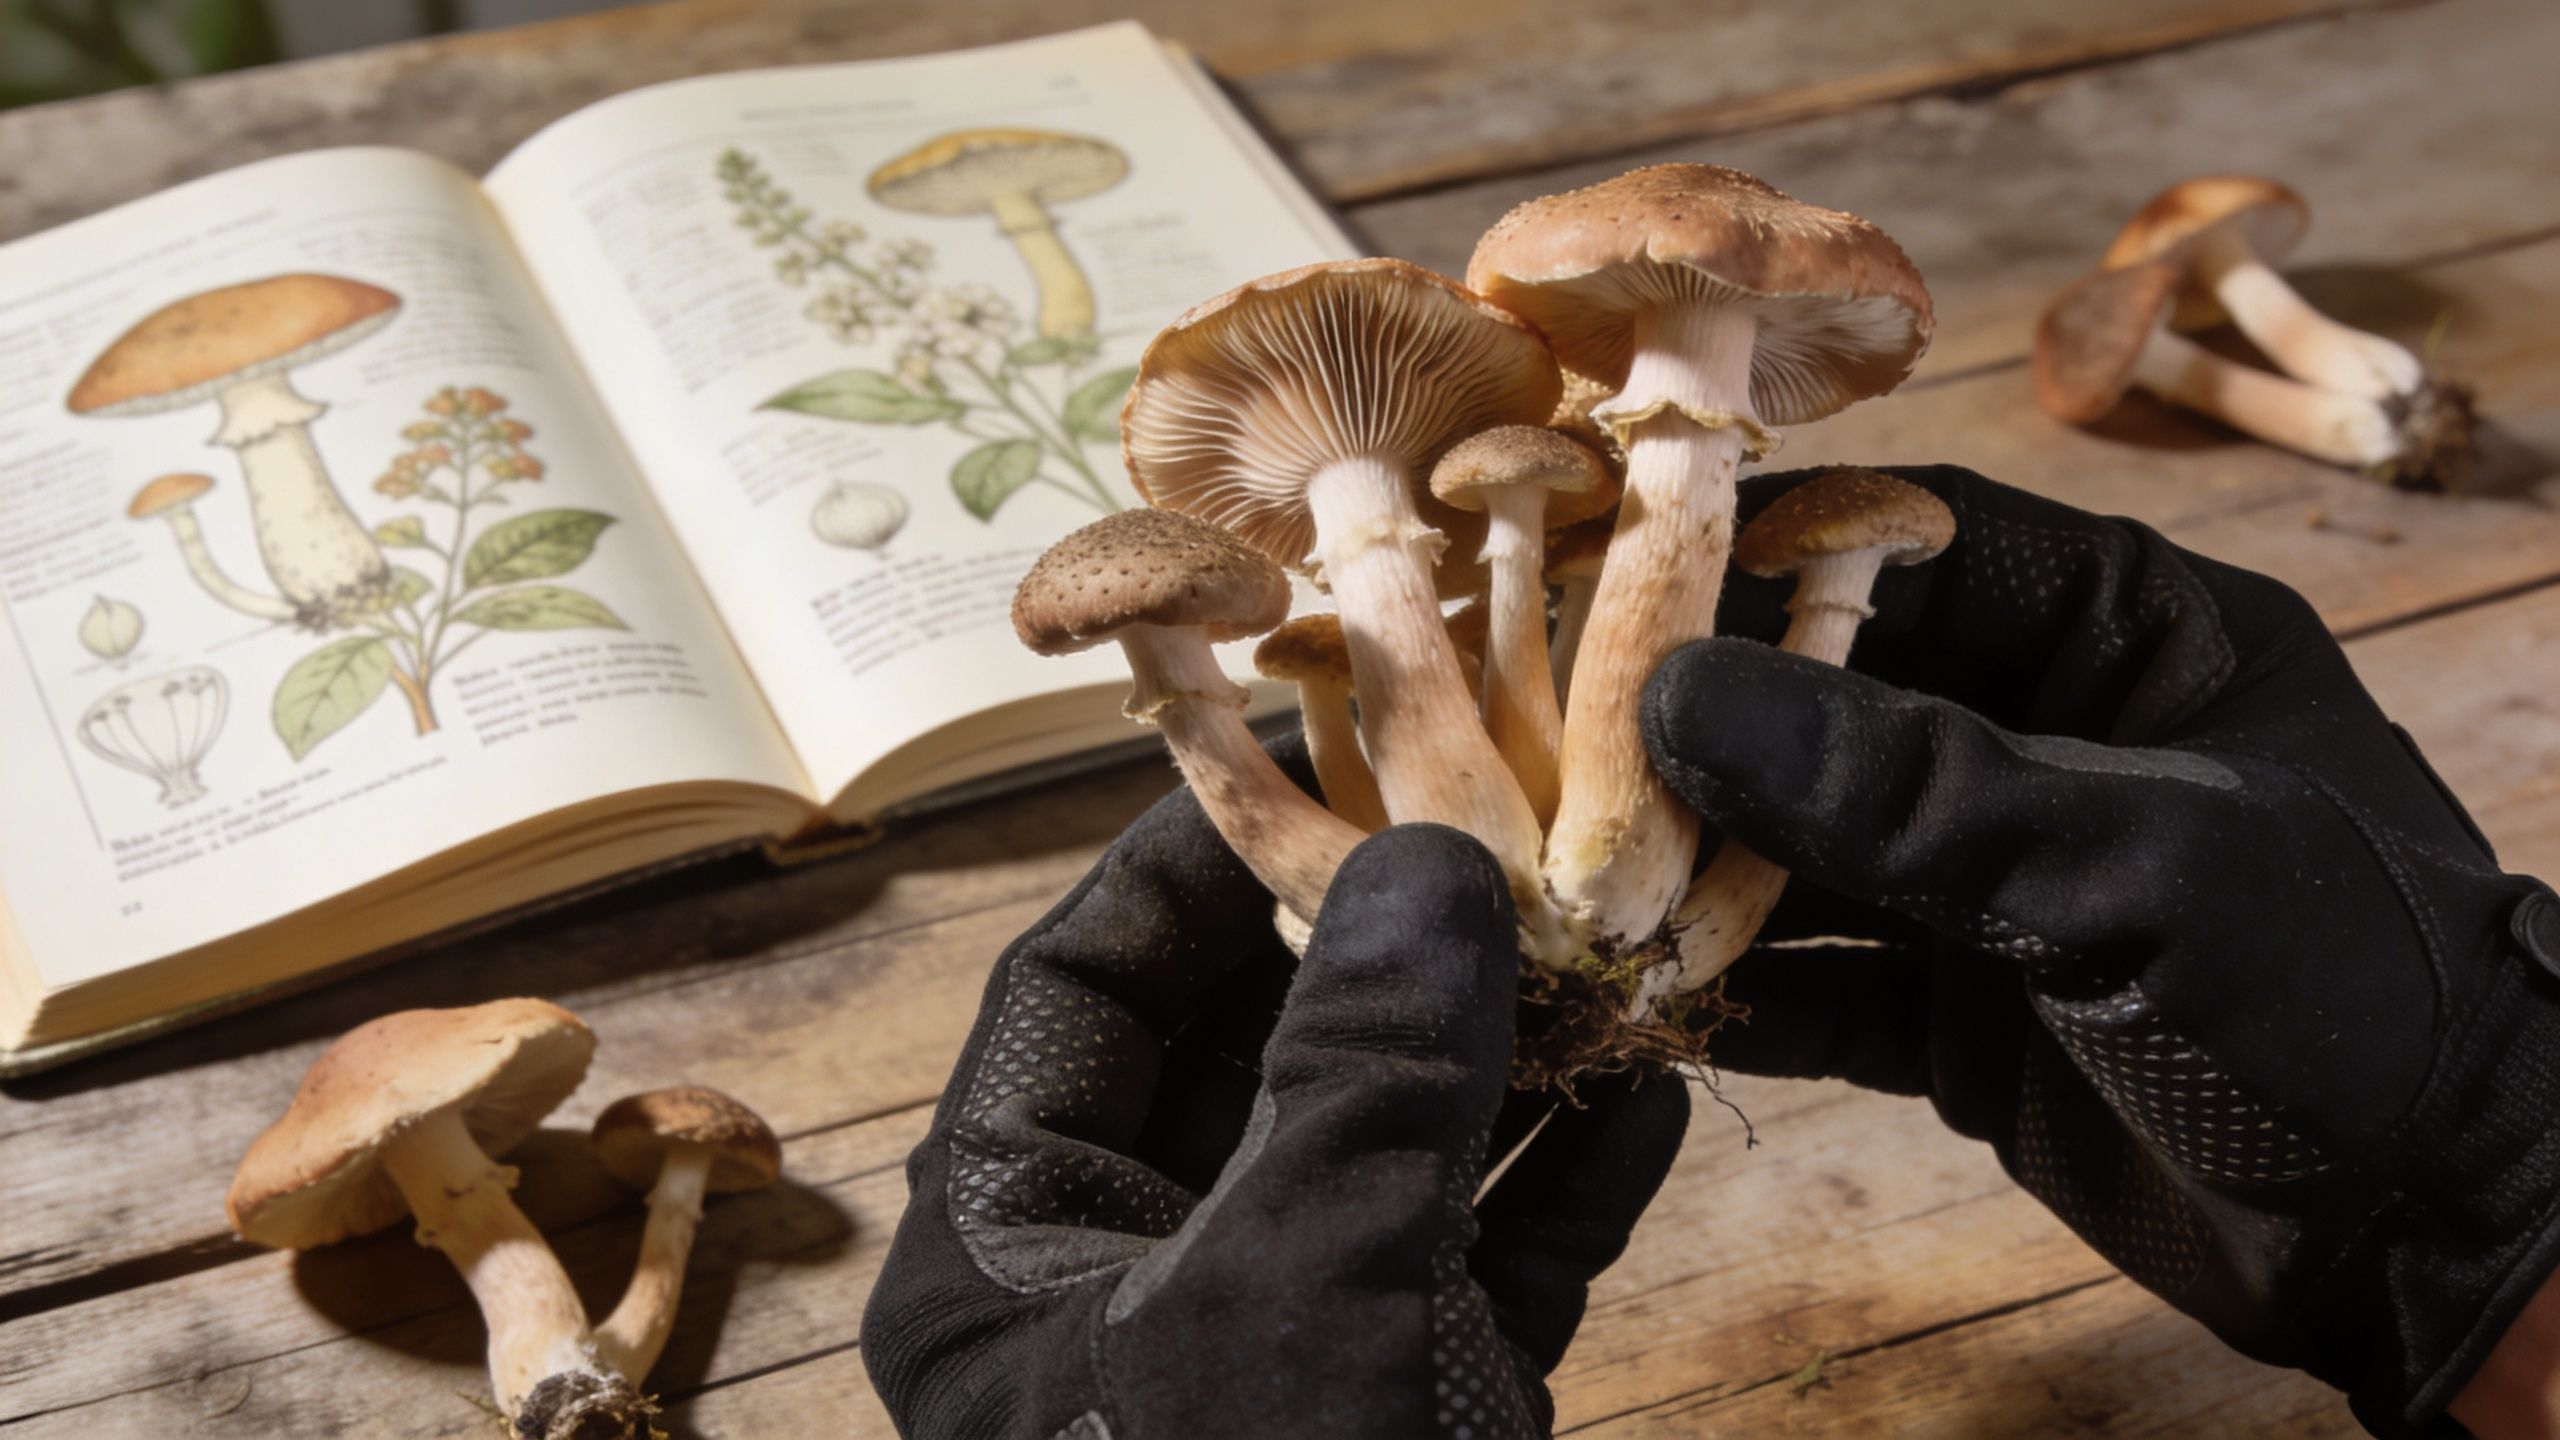
If you’re still learning the basics of morphology, contamination, and handling, start with a solid beginner guide to magic mushrooms before you harvest anything.
Identification has to be absolute
If you grew from a trusted culture in a controlled setup, identification is usually more straightforward than wild foraging. Even then, mutations, contamination, and user error happen. You need to recognize the expected cap shape, stem structure, bruising behavior, and growth pattern of what you intended to cultivate.
Don’t use one trait as your whole ID system. Bluing alone isn’t enough. Cap color alone isn’t enough. “It looks close enough” definitely isn’t enough.
Practical rule: If you wouldn’t bet your health on the identification, you’re not ready to pick it.
That applies even more strongly if any fruit looks odd compared with the rest of the flush. A single deformed mushroom doesn’t always mean danger, but it does mean you should slow down and inspect carefully instead of harvesting on autopilot.
Learn to spot contamination before touching the fruits
A clean harvest starts with reading the substrate surface and the base of the stems. Healthy mycelium usually looks bright white and organized. Contaminants often show up as off-colors, wet patches, powdery growth, or textures that look wrong for mushroom tissue.
The contamination growers talk about most is trichoderma, often called green mold. Early on, it may look pale or white, which is why people miss it. Later it turns green and spreads fast. At that point, the batch isn’t something you “work around.” It’s compromised.
Watch for these signs before harvesting:
- Green patches: Especially powdery green on the substrate or around stem bases.
- Sour or rotten smells: Healthy mushroom grows have an earthy smell, not a foul one.
- Slimy tissue: Mushrooms that feel wet, collapsing, or greasy can signal bacterial trouble.
- Unusual discoloration in the substrate: Not every color shift is contamination, but random blotches deserve inspection.
If you see contamination, don’t assume you can pluck the clean-looking fruits and ignore the rest. Sometimes that judgment is wrong, and beginners are usually worst at making it.
Responsible growing means knowing the legal risk too
People often talk about psilocybin law as if it’s either legal or illegal everywhere in exactly the same way. Reality is messier. Some places have decriminalized possession or deprioritized enforcement, but that isn’t the same as broad legality, consumer protection, or zero risk.
That matters because casual advice online can make cultivation sound consequence-free. It isn’t. Responsible growers stay informed about local rules, keep their process discreet, and avoid giving themselves a false sense of security based on headlines.
Safety checks before any harvest
Run this quick mental checklist before you touch the first stem:
- Confirm the grow is clean. No visible contamination, no bad smell, no suspicious slime.
- Confirm the fruits match the culture. Shape, clustering, bruising, and cap development should make sense.
- Use clean hands or gloves. You’re handling both the harvest and the future flush.
- Have your drying setup ready. Fresh mushrooms don’t wait around well.
- Don’t harvest while guessing. If you’re uncertain, pause and reassess.
A mushroom that’s perfectly timed but poorly identified is not a successful harvest. It’s a bad decision made at the right hour.
Reading the Veil The Classic Harvest Signal
If you only learn one harvest cue, learn the veil. It’s the classic signal for a reason. On many cubensis grows, it gives the cleanest, easiest answer to the question of when to pick magic mushrooms.
The veil is the thin membrane that stretches from the edge of the cap to the stem while the mushroom matures. As the cap expands, that membrane gets thinner and tighter. Eventually it starts to tear. That moment is what growers mean when they say the veil is “breaking.”
What the veil looks like at each stage
A young mushroom usually has a rounded cap and a clearly attached veil. The cap edge still curves downward, and the whole fruit looks compact. At this point, it still has growing left to do.
A mushroom in the sweet spot looks more open. The cap has widened, the veil is stretched, and you may see the first split forming where the membrane meets the cap. Sometimes it looks like a thin skirt starting to separate.
A mushroom left too long often has a fully open cap. The veil is gone or hanging in ragged fragments, and the cap may flatten noticeably. If spores drop, you’ll often see dark dusting on caps below or on the substrate.
| Veil Status | Visual Cue | Harvest Action |
|---|---|---|
| Intact and tight | Cap still rounded, veil smooth and fully attached | Wait and keep checking |
| Stretching | Cap widening, veil looks thin and under tension | Prepare to harvest soon |
| Just breaking | Small tear visible, partial separation from cap edge | Ideal time to pick |
| Fully separated | Veil detached, cap opening more broadly | Harvest now if you haven’t already |
| Long past break | Flat cap, ragged veil remnants, visible spore dust | Pick immediately and expect more cleanup |
Why growers use the veil as the main signal
The veil works because it’s easy to read without tools and easy to spot across a whole flush. It also lines up well with a mushroom’s visible maturity. For a beginner, that matters more than chasing ultra-fine timing.
There’s another practical benefit. If you harvest around veil break, you usually avoid heavy spore release. Spore drops aren’t a disaster, but they create a mess, darken the grow surface, and make later fruits harder to inspect quickly.
Pick for structure, not size. A smaller mushroom with a veil just starting to tear is usually better timed than a larger one that already dropped spores.
That’s the part many new growers miss. Bigger doesn’t automatically mean better. Mushrooms can look impressive and still be slightly past their best harvest window.
How to check a flush without damaging it
Don’t grab caps and squeeze them every few hours. Look closely first. Use the side view. The cap edge and upper stem tell you more than the top-down view does.
Check the tallest fruits first. In most tubs, a few mushrooms race ahead and hit maturity before the rest. If you wait for every fruit to match the biggest one, you’ll leave the early mushrooms too long.
A better approach is selective harvesting:
- Pick the leaders first: Remove fruits whose veils are breaking.
- Leave the laggards: Smaller pins and slower fruits can continue developing.
- Recheck later the same day: Harvest windows can tighten fast near maturity.
Too early versus too late
Picking too early usually gives you mushrooms with under-opened caps and tight veils. They dry fine, but you gave up some final development. New growers often do this because they’re nervous about missing the window.
Picking too late creates different problems. You’ll often see open, flattened caps and spore dust. The flush looks older, cleanup takes longer, and some fruits may start softening at the edges if you really pushed it.
Here’s the simplest visual comparison:
- Too young: Rounded cap, veil fully attached, compact shape
- Just right: Cap opening, veil stretched or just tearing
- Too late: Cap flattened, veil gone, spores visible
One habit that improves timing fast
Check your grow more often as fruits approach maturity. Early growth can feel slow, then suddenly the mushrooms change shape between morning and evening. The last stage is where beginners get surprised.
If you’re unsure, don’t ask “Is it fully mature?” Ask this instead: “Is the veil still intact, stretching hard, or beginning to tear?” That question gives you a practical answer you can act on.
For standard cubensis grows, veil reading gets you very far. It’s the baseline skill every home cultivator should trust before trying to read subtler cues.
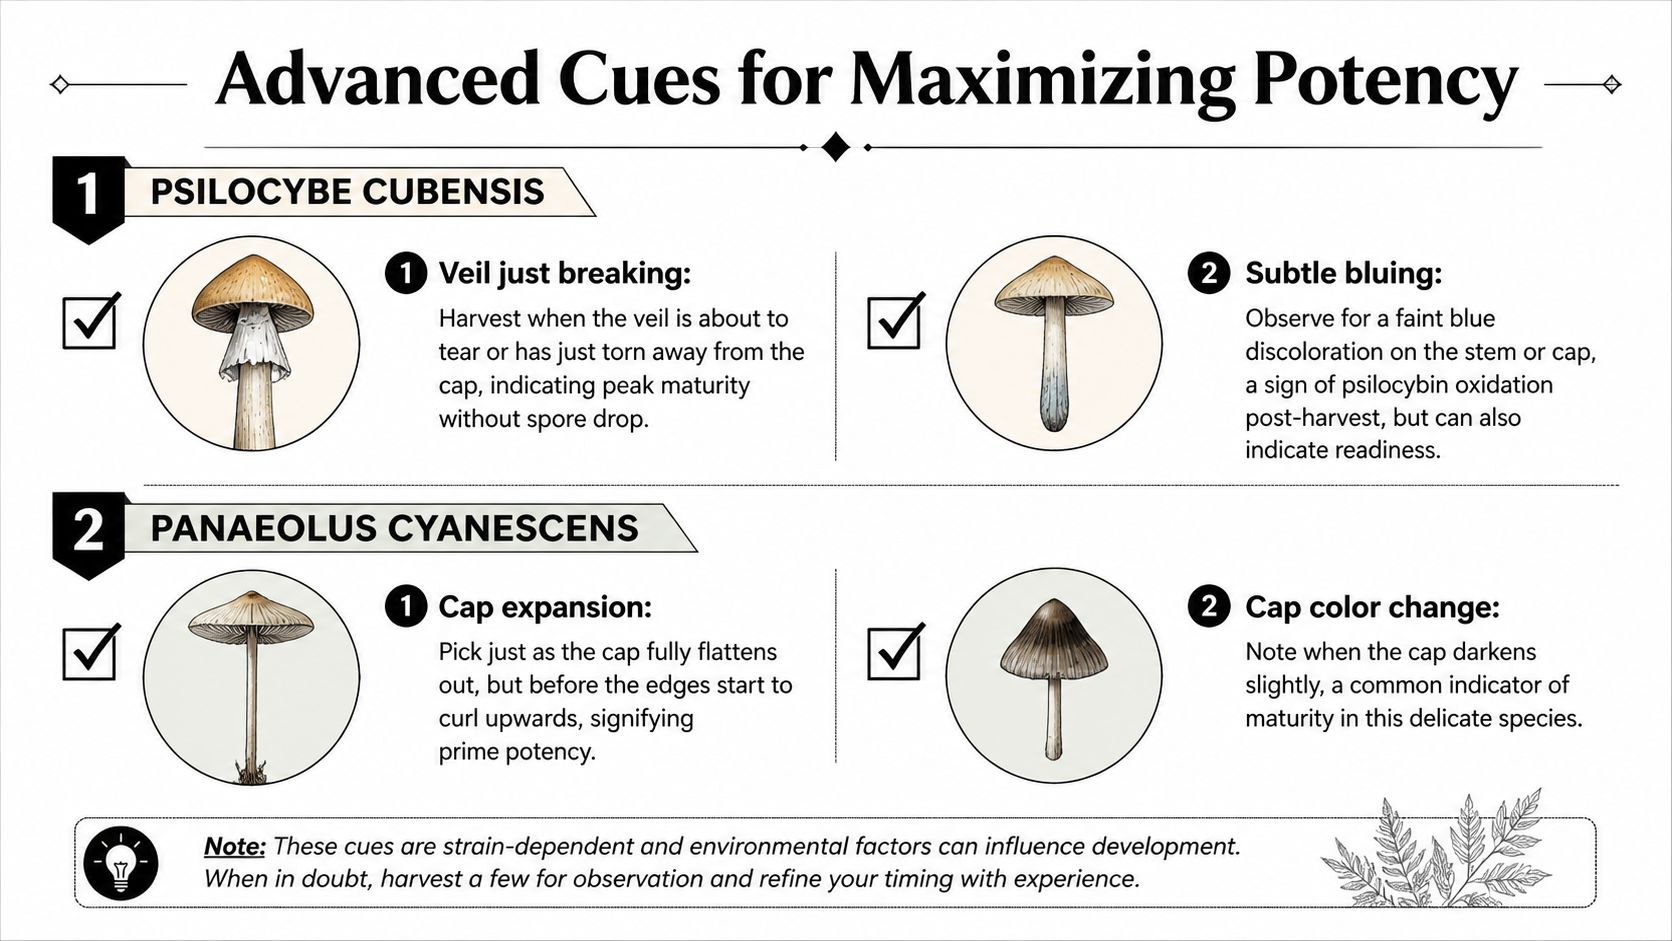
Advanced Cues for Maximizing Potency
The veil is still the foundation. But experienced growers eventually notice that the best harvest timing isn’t always identical from one strain, flush, or grow environment to the next.
That’s especially true when you’re working with mushrooms that don’t follow the standard cubensis look-and-timing pattern. It’s also true when your tub’s microclimate shifts how fast a fruit matures and how it expresses maturity.
As noted in Zombie Myco’s discussion of mushroom harvest timing, most guides focus almost entirely on veil status, while rarely addressing how humidity, temperature, and CO₂ levels inside home grows can shift the optimal veil window. The same source also notes that academic work on fungal secondary metabolites suggests psilocybin accumulation is influenced by developmental stage and environmental stress, and that practical signals such as slight cap texture changes or subtle color shifts under specific lighting remain underexplored in consumer-facing cultivation advice.
If you want to understand how different cubensis expressions can behave, it helps to study a Psilocybe cubensis strain overview alongside your own grow notes.
Strains don’t all read the same
Penis Envy often teaches growers this lesson first. It may not present the neat, obvious veil timing people expect from more standard cubensis fruits. The stems can thicken heavily, the caps may stay comparatively less open, and the usual visual milestones can feel muted.
Enigma pushes that even further. It’s a mutation with growth that doesn’t fit the classic mushroom silhouette, so “wait for veil break” doesn’t help much when there isn’t a normal cap-and-veil structure to read in the first place.
In those cases, growers rely more on a cluster of cues:
- Surface texture changes: The fruit body may shift from a fresher, denser look to a slightly softer or more finished texture.
- Color settling: Some fruits show subtle deepening or tonal change as they approach ideal maturity.
- Growth slowdown: Rapid swelling tapers off, and the fruit looks less like it’s actively stretching.
- Firmness: The tissue remains healthy but no longer feels like it’s in that fast expansion phase.
Read the room, not just the mushroom
Microclimate changes how mushrooms present themselves. A tub with higher humidity and stale air may produce fruits that look puffy, elongated, or slower to open. Lower humidity can change cap texture. CO₂ buildup can alter stem length and cap development enough that “normal” timing cues become less reliable.
That’s why basic tools help. A simple hygrometer or CO₂ meter won’t replace observation, but it gives context to what your eyes are seeing.
A mushroom doesn’t mature in isolation. It matures inside a specific set of air, moisture, and temperature conditions that shape how that maturity appears.
Advanced timing becomes less about a single universal rule and more about consistency. If one flush matured beautifully at a certain humidity range and fresh-air pattern, note it. If another flush looked stretched and oddly delayed, note that too.
Subtle cues worth watching
These cues are easy to miss until you’ve watched a few harvests closely:
Cap texture shifts
Some fruits lose their youthful smoothness just before the ideal pick window and take on a slightly different finish.Color under the same lighting
Compare fruits in the same light each time. Slight darkening or deepening can matter more than people think.Rate of change
Mushrooms that have been racing upward often signal maturity by slowing down, not by stopping all at once.
The point isn’t to abandon the veil. It’s to understand that the veil is often the first layer of a better read, not always the final one.
The Art of a Clean Harvest Proper Picking Technique
A well-timed mushroom can still be harvested badly. If you rip fruits out carelessly, tear chunks of substrate loose, or mash neighboring pins, you make the next flush harder on yourself.
The best habit is simple. Be gentle and deliberate. Fast hands ruin more tubs than slow hands ever do.
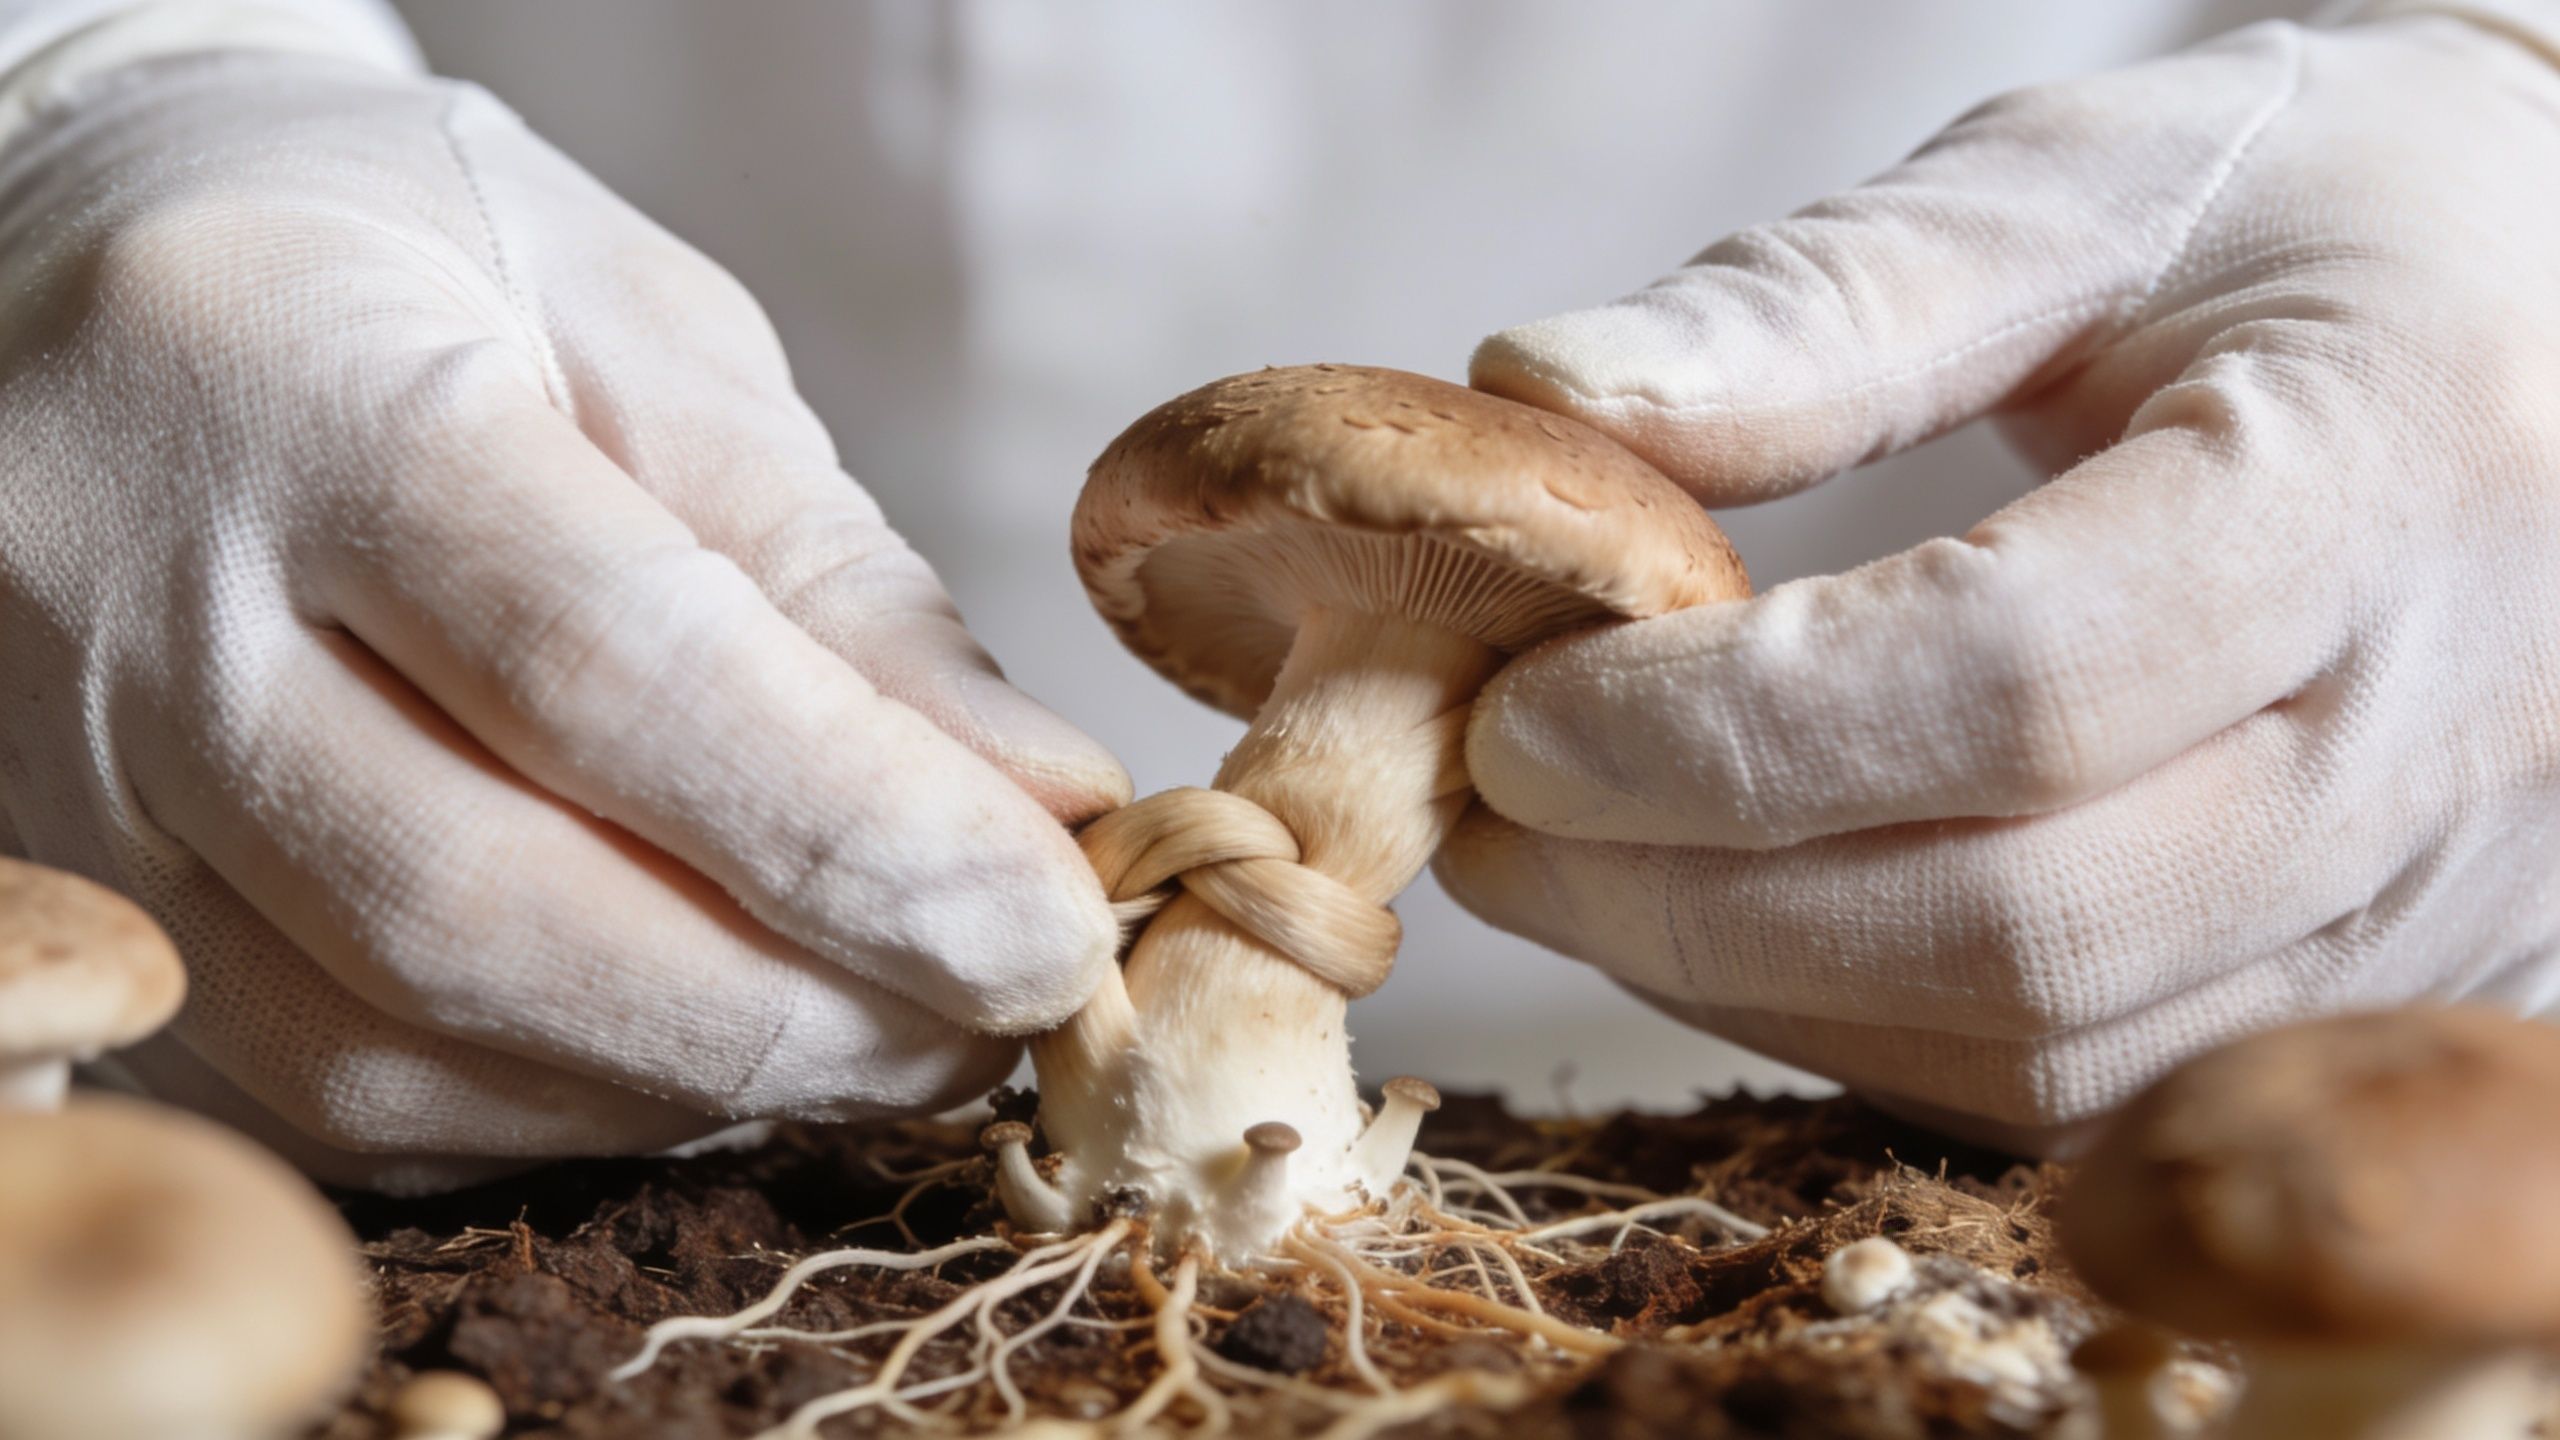
The twist and pull method
For single fruits or loose clusters, the standard method is still the best one. Grasp the mushroom low on the stem, near the base. Twist gently, then pull upward with light pressure.
You’re not trying to wrench it free. You’re trying to release it cleanly.
That small twist matters because it breaks the attachment without gouging the surface as much as a straight yank. If the fruit resists, don’t escalate into force. Reposition your grip and try again with a smaller twisting motion.
A clean pick usually leaves only a minor divot. That’s fine. What you want to avoid is removing a large chunk of colonized substrate attached to the stem base.
When tools work better
Dense clusters don’t always give you enough room to twist each fruit individually. In that situation, a small clean knife or curved scissors can be the smarter choice.
Use tools when:
- Pins crowd the base: Twisting one fruit would crush the rest.
- The cluster is fused: Several stems are packed too tightly to separate by hand.
- A side fruit is awkwardly placed: Cutting avoids dragging it across neighboring mushrooms.
Cut close to the base without digging into the substrate. If a tiny stump remains, that’s usually better than gouging a crater.
Clean technique protects the mycelium you can’t see. The surface damage is only part of the story.
Do this, not that
A quick comparison helps:
Do this: Hold at the base, twist lightly, lift with control.
Not that: Grab the cap and yank.
Do this: Harvest mature fruits first and leave healthy smaller ones alone.
Not that: Clear the whole tub because one mushroom is ready.
Do this: Use a blade for crowded clusters.
Not that: Force a twist where there’s no room.
Do this: Brush away loose substrate gently after harvest.
Not that: Scrape and dig at the surface.
Watch the hand movement here if you want a visual reference on careful handling and removal:
What works best over multiple flushes
Growers often obsess over the current harvest and forget the substrate still has work to do. If your goal is several productive flushes, preservation matters. Clean picks reduce stress on the surface, keep the tub tidier, and make it easier to monitor what happens next.
After harvest, inspect the exposed spots. Remove obvious debris, leave the healthy mycelium alone, and resist the urge to over-clean. The mycelium knows how to recover better than most beginners do.
Post-Harvest Care Drying and Storing for Longevity
Fresh mushrooms don’t stay fresh for long. Once picked, they start losing quality quickly, and if you leave them in a pile at room conditions, they can soften, darken, and spoil.
That’s why harvest isn’t finished when the mushrooms leave the tub. It’s finished when they’re properly dried and stored.
Dry them until cracker dry
The target is simple. You want the mushrooms dry enough that they snap cleanly rather than bend. Growers call that cracker dry.
If they still flex, there’s still moisture inside. That leftover moisture is what causes trouble later.
Two common drying methods work well:
- Food dehydrator: This is the most reliable option for most home growers. It moves air consistently and dries the harvest evenly.
- Air drying with a fan: This can work if your environment is dry enough, but it’s slower and less forgiving.
A dehydrator is easier because it reduces guesswork. Fan drying can help at the beginning, especially for surface moisture, but many growers still finish with more active drying to get to a true snap-dry state.
Don’t confuse dry-looking with dry enough
A mushroom can look dry on the outside and still hold moisture in the stem core. Thick fruits make this especially easy to misjudge. If you store them too early, they can rehydrate slightly inside the jar and lose quality.
Check the thickest stem, not the thinnest cap edge. If the thick part snaps, you’re much closer to safe long-term storage.
For a deeper walkthrough, see this guide on drying Psilocybe cubensis.
Smart storage beats fancy storage
Once the mushrooms are fully dry, protect them from the three things that shorten shelf life most: moisture, oxygen, and light.
The simplest strong setup is:
- An airtight glass jar
- A food-grade desiccant packet
- A cool, dark storage spot
That combination works because it keeps the environment stable. Plastic bags are less dependable for long storage. They’re fine for short handling or sorting, but not my first choice if you care about preserving the harvest well.
If you did the hard part right, don’t ruin it with lazy storage.
Common mistakes after harvest
These are the usual errors:
- Bagging them while still soft: This traps moisture.
- Leaving them exposed overnight: Freshly dried mushrooms can pull moisture back from the air.
- Storing in bright or warm areas: Heat and light don’t help you.
- Using a loose lid: “Mostly sealed” isn’t sealed.
A careful dry and a sealed jar turn a rushed harvest into a usable one. They also preserve the work you put into timing the harvest correctly in the first place.
The Simpler Alternative Sourcing from Metro Mush
Home cultivation can be rewarding, but it asks a lot from you. You need patience, cleanliness, legal awareness, decent technique, and a feel for timing that only gets better with practice. For many adults, that’s part of the appeal. For others, it’s the exact reason they’d rather skip growing altogether.
That preference makes sense. If your main interest is the final product, not the full cultivation process, harvesting questions quickly turn into a long list of chores. You’re not just deciding when to pick magic mushrooms. You’re managing contamination risk, drying logistics, storage, and the uneven behavior of strains that don’t always follow textbook cues.
For adults in Southeast Michigan, a simpler route is buying from a local provider that already handles cultivation and product selection. That removes the hardest part for beginners and the most tedious part for experienced users. It also gives people access to products without needing to turn a closet, tub, or spare room into a mini grow operation.
Why some adults choose sourcing over growing
Some people love dialing in a grow chamber. Some don’t. If you’re in the second group, outsourcing the cultivation side can be the more practical decision.
That’s especially true if you’re interested in products beyond dried whole mushrooms. Many adult consumers prefer more approachable formats, lower-friction dosing, or options that fit social settings better than a bag of dried fruit bodies.
A sourcing approach also avoids one of the classic beginner problems: chasing strain names without understanding how much work some of those strains require to grow and harvest well.
A better fit for convenience and consistency
Professionally prepared offerings can be simpler to manage than a home harvest, especially for people who want a more predictable experience. Instead of guessing at readiness, trimming substrate off stems, and drying fruits correctly, you can choose from established formats that suit how you want to use them.
That includes dried mushrooms, but also edibles and drinks that many adults find less intimidating than whole fruits. If your goal is convenience, privacy, and less room for handling mistakes, sourcing wins on simplicity.
Where Metro Mush fits
Metro Mush serves adult consumers in the Detroit and Ann Arbor areas with a curated menu that includes dried strains such as Penis Envy and Enigma, along with products like OuterSpore Milk Chocolate Bars, Mush Love Chocolate Bars, Rocket Fuel shroom drinks, and Moon Bars. Orders can be placed by text for both metro areas, and the service also offers community deals, a $75 minimum order, ongoing 10% off for fire, police, and veterans, and a 20% discount for community members who join the brand’s Discord, according to the Metro Mush website.
If you’d rather skip the contamination checks, harvest timing, drying setup, and storage learning curve, Metro Mush offers a straightforward way for adult customers in Southeast Michigan to access curated mushroom products, browse the menu, and order by text for Detroit Metro or Ann Arbor delivery and pickup.