


You’ve put in the work and just finished a successful harvest. Now comes the most important step: drying. This isn't just about keeping mold away; it's about locking in the potency you worked so hard to cultivate.
Why Proper Drying Is Critical for Potency
Many growers think drying is just about preventing spoilage. While that’s part of it, the real mission is to preserve the delicate active compounds inside the mushrooms. Freshly picked mushrooms are made up of over 90% water, creating the perfect storm for oxidation and enzymes to start breaking down psilocybin and psilocin.
Psilocin, in particular, is incredibly unstable. It degrades rapidly when it meets oxygen and moisture. That blue bruising you see when a mushroom is handled? That’s psilocin breaking down right before your eyes.
The Science of Preservation
Proper drying puts a dead stop to this degradation. By gently removing all the water, you’re essentially hitting the pause button, preserving the mushroom's chemical profile at its absolute peak. It's the difference between a potent, stable product and a batch that loses its magic within weeks.
Think of it like drying fresh herbs from your garden. If you just leave them on the counter, they’ll wilt and lose all their aroma and flavor. But when dried correctly, their essence is captured for months. The same principle applies here, but the compounds at stake are far more sensitive.
Your main goals when drying are to:
- Stop enzyme activity that degrades active compounds.
- Prevent mold and bacteria from growing, which ensures your harvest is safe.
- Lock in potency by creating a stable environment for long-term storage.
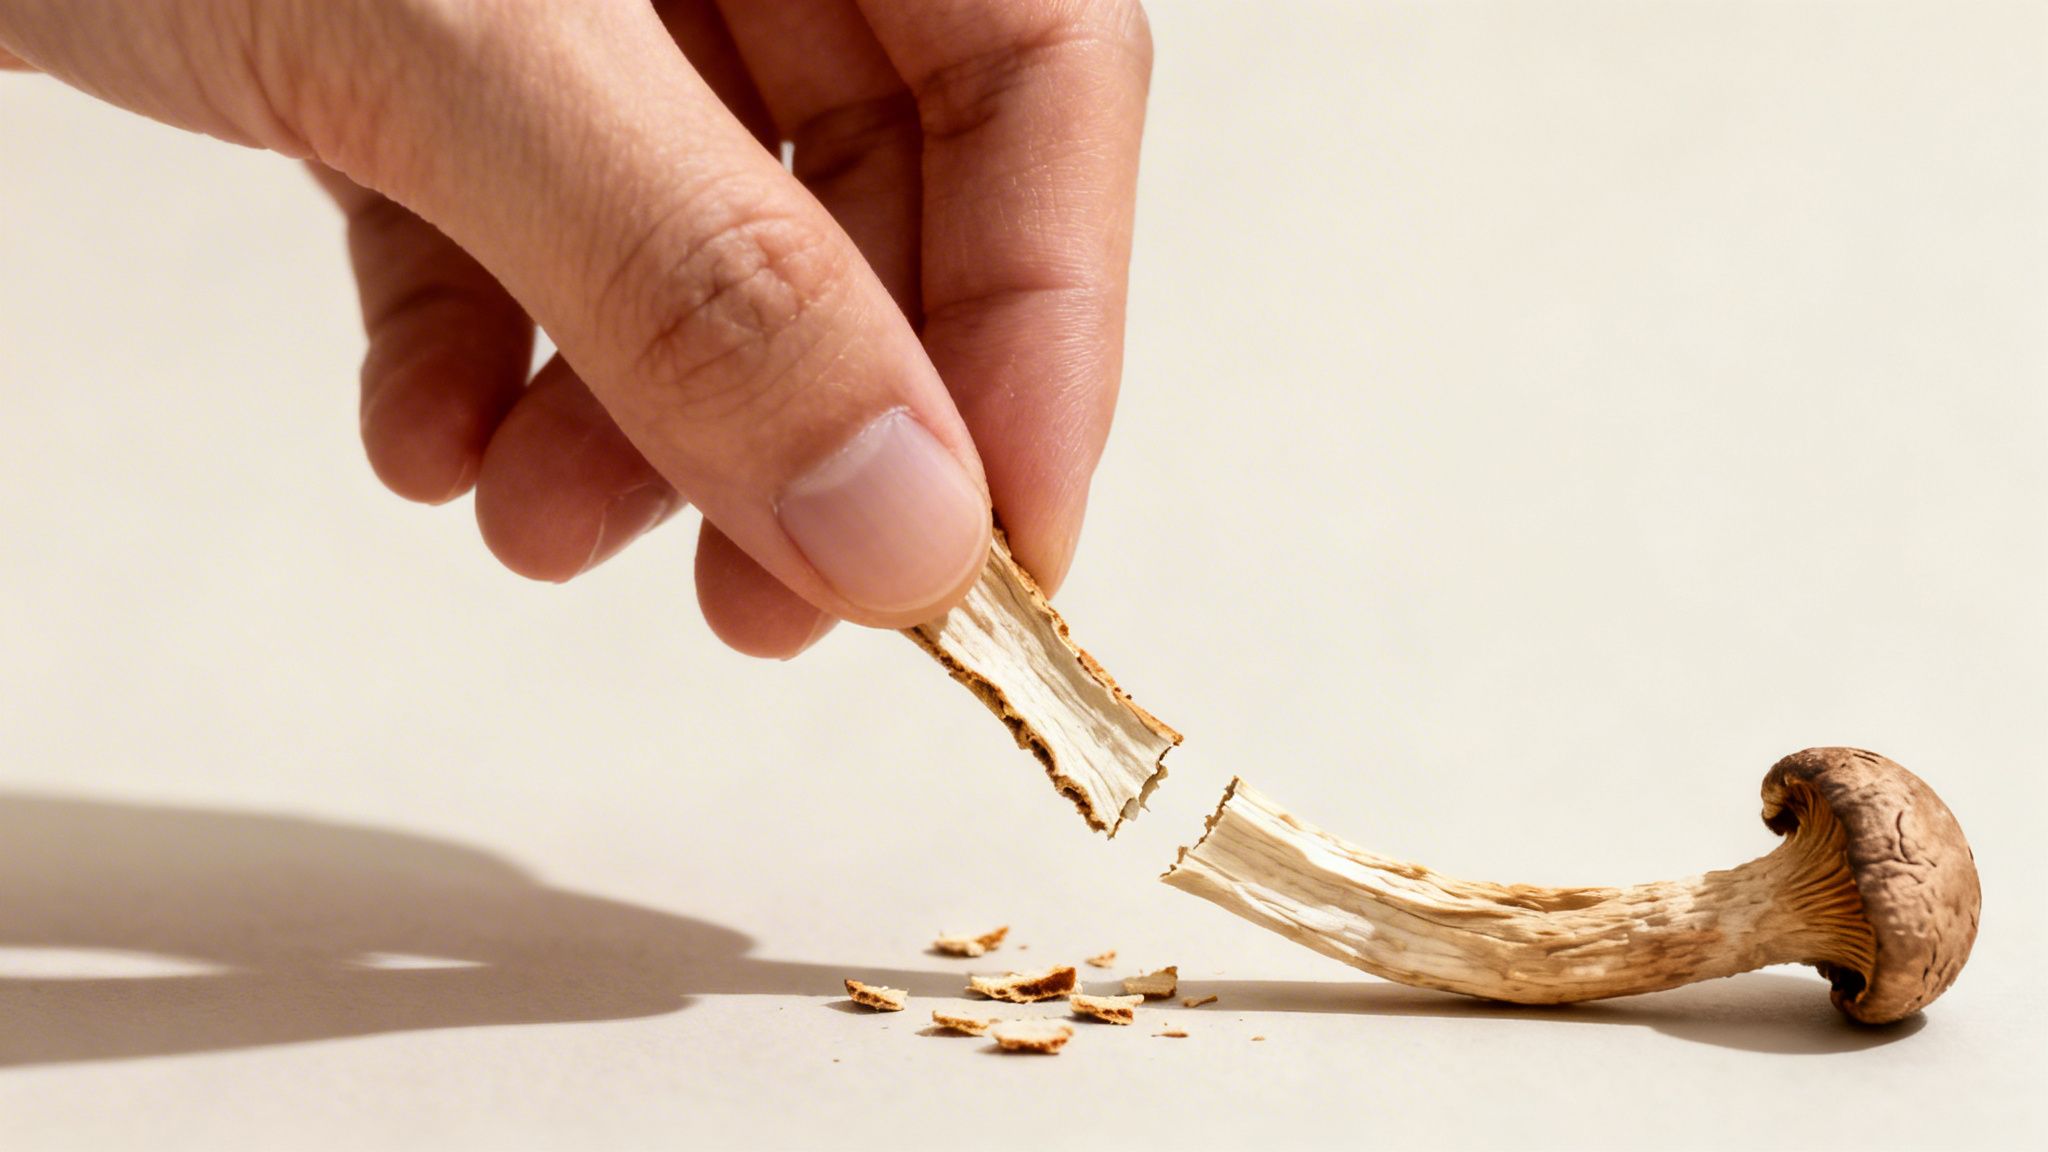
The 'Cracker Dry' Gold Standard
So, how dry is dry enough? Your goal is to get them "cracker dry." This is the gold standard for a reason. A perfectly dried mushroom will be so brittle that it snaps cleanly with an audible crack when you try to bend it.
If there’s any bend or flex at all, it’s not done. That little bit of leftover moisture is enough to let degradation continue, even if it's happening more slowly.
The difference between a bendy, leathery mushroom and one that snaps like a twig is the difference between losing potency in weeks versus preserving it for over a year. This detail cannot be overlooked.
A common mistake is thinking a mushroom is dry just because it feels that way on the outside. Thick stems can easily hide moisture deep inside, which is a ticking time bomb for your entire stored batch.
As you get ready for harvest, you might also be exploring different psilocybe cubensis strains and their unique qualities. No matter the strain, getting the drying process right is what makes all the difference, as you can see in the table below.
Proper vs Improper Drying Outcomes
Here’s a quick look at what you can expect when you get it right versus what happens when you cut corners.
| Attribute | Properly Dried (Cracker Dry) | Improperly Dried (Still Bendy) |
|---|---|---|
| Potency | Maximum potency preserved for a year+ | Significant potency loss within months |
| Shelf Life | 12+ months in ideal conditions | 1-3 months before mold or spoilage |
| Texture | Brittle, snaps cleanly with an audible crack | Leathery, bends without breaking |
| Risk of Mold | Extremely low | High, especially in humid environments |
| Storage Safety | Safe for long-term airtight storage | Risk of contaminating entire stored batch |
As you can see, taking the time to dry your harvest completely isn't just a suggestion—it's essential for ensuring the quality, safety, and longevity of your mushrooms.
Of all the ways to dry your harvest, using a food dehydrator is hands-down the most reliable method for getting consistent, repeatable results. If you want to take the guesswork out of drying, this is the way to go. It replaces all the variables like room temperature and humidity with controlled, gentle heat and airflow.
This isn't just about convenience. Having that control is key to preserving the sensitive compounds you’ve worked so hard to cultivate. A dehydrator helps you nail that perfect “cracker dry” texture safely and efficiently every single time.
Choosing the Right Dehydrator
You don't need a fancy, expensive machine to get professional-grade results. The one feature that truly matters is an adjustable temperature setting. This is non-negotiable. Many of the cheap, basic models are designed for making jerky and run way too hot for our purposes.
Look for a unit that lets you dial in a specific, low temperature. A model with a fan, usually at the back or bottom, is also a huge plus because it actively circulates the air and ensures everything on every tray dries evenly.
Optimal Temperature and Settings
The secret to drying psilocybe cubensis is finding that perfect balance—warm enough to pull out moisture but cool enough to protect potency. The ideal range is between 95–115°F (35–45°C). Sticking to this gentle heat is your best insurance policy for preserving the mushroom's integrity.
Why is this so critical? Excessive heat absolutely destroys psilocybin. Research has shown that potency can drop by as much as 80% at temperatures around 150°C. This is exactly why we stress low-and-slow methods. If you're curious about the science, the Oregon Health Authority published some great research on psilocybin stability.
Pro Tip: If your dehydrator just has vague "Low," "Medium," and "High" settings, grab a cheap oven thermometer. Stick it on a tray and run the "Low" setting for a bit. This will tell you the actual temperature before you risk your precious harvest.
Arranging Your Mushrooms for Success
How you lay out your mushrooms on the trays is just as important as the temperature. Your goal here is simple: get as much air flowing around each mushroom as possible.
Give Them Space: Place your mushrooms in a single layer, making sure none of them are touching. Overcrowding is a common mistake that creates damp spots and leads to uneven drying.
Mind the Size: Got a mix of big and small fruits? No problem. I like to put the really large ones on the bottom trays, since they're often a touch warmer. You can even slice extra-thick stems or caps in half to help them dry at the same pace as the smaller ones.
The whole process can take anywhere from 4 to 12 hours. It really depends on the size and water content of your mushrooms, plus the humidity in the room. Little guys might be done in just a few hours, while dense, chunky ones will take much longer.
Check on them every couple of hours. You’ll see them shrink dramatically as they lose their water weight—fresh mushrooms are about 90% water, after all. They're getting close when they feel light and brittle. The real test isn't about time, though; it's all about that perfect, cracker-dry snap.
Effective Alternatives to a Dehydrator
So, you don’t have a dehydrator. Don’t sweat it. While a food dehydrator gives you pinpoint control over the drying process, it’s by no means the only way to get your harvest perfectly preserved.If you’re looking for a more low-tech approach or just don't have the counter space, there are a couple of tried-and-true methods for drying Psilocybe cubensis using stuff you probably already have around the house. They might require a bit more patience, but with a little attention to detail, you’ll get the same cracker-dry results. The secret to success is always the same: maximize airflow and kick ambient moisture to the curb.
Let's walk through two of the most popular and reliable techniques I've used over the years.
The Box Fan and Mesh Screen Method
This method is a classic for a reason—it’s cheap, simple, and surprisingly effective. All you’re doing is using the steady, gentle breeze from a regular box fan to wick moisture away from your fresh mushrooms over a few days. Think of it as building your own DIY air-powered dehydrator.
You only need a few things to get this going:
- A standard box fan
- A fiberglass window screen or a similar mesh material
- Your freshly harvested mushrooms
First, lay your box fan flat on its back so it’s blowing air up toward the ceiling. Then, just place your mesh screen right on top of the fan’s grill. This creates a perfect little drying platform where air can flow up and all around the mushrooms.
Now, go ahead and arrange your mushrooms on the screen in a single layer. This is really important: make sure they aren’t touching. Any contact points can trap moisture and become a breeding ground for mold. If you’ve got a big harvest, you can even stack multiple screens by propping up the corners with books or small blocks to create airflow between the layers.
Crank the fan on a low or medium setting and just let it run.
This process usually takes anywhere from 24 to 72 hours. The exact timing really depends on how humid your room is and how big and dense your mushrooms are. They’ll get most of the way there but might still feel a bit spongy to the touch. This technique is a fantastic first step, but for that truly "cracker-dry" finish, you'll want to follow it up with a desiccant.
Using a Desiccant Drying Chamber
After fan-drying, or if you're just working with a small batch, a desiccant chamber is the final boss for pulling out that last bit of stubborn moisture. A desiccant is just a substance that aggressively sucks water out of the air, creating a super-dry environment that your mushrooms will love.
Here’s what you'll need to build one:
- An airtight container, like a big Tupperware or a glass jar with a good seal
- A desiccant, like food-grade silica gel packets or oven-dried Epsom salt
- A small wire rack or screen that fits inside your container
If you decide to go the Epsom salt route, spread a layer on a baking sheet and bake it at 400°F (200°C) for about two hours. This process boils off all the existing water in the salt, essentially "recharging" it to make it extremely absorbent. Just make sure you let it cool down completely before you use it.
Cover the bottom of your airtight container with a generous layer of your chosen desiccant. Place the wire rack over it, making sure your mushrooms won't come into direct contact with the drying agent.
Now, place your fan-dried mushrooms on the rack, seal the container up tight, and stash it in a cool, dark place. The desiccant will handle the rest, slowly pulling every last bit of moisture from the mushrooms over the next few days to a week. Just check on them every so often until they snap cleanly when you try to bend them.
This simple flowchart can help you decide which path to take.
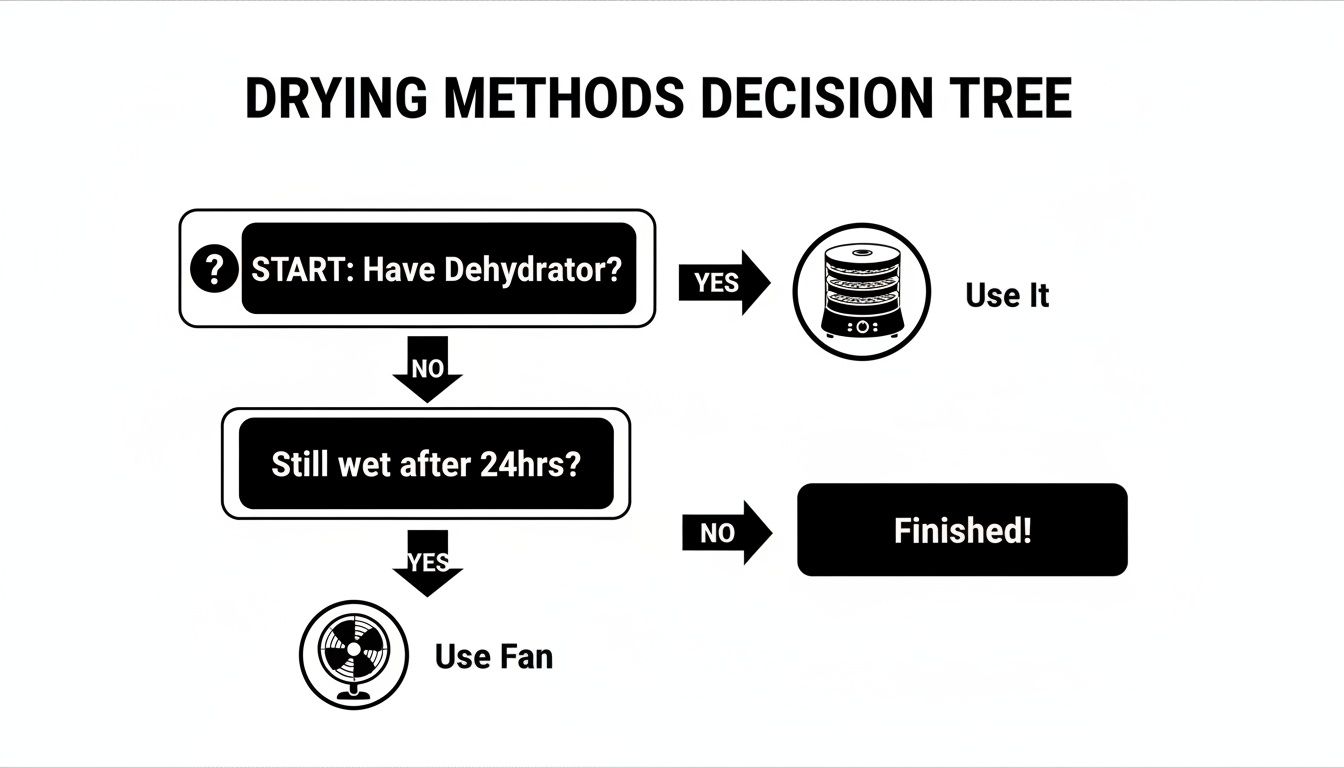
As the graphic shows, a dehydrator is the most direct route, but not having one just means you'll be taking a reliable detour with a fan and desiccant.
The drying method you choose really does impact the final quality of your harvest. Research shows that controlled drying, which you can achieve with these methods, is far better at preserving the good stuff and hitting low moisture targets compared to less-controlled techniques like leaving them out in the sun.
Once your mushrooms are bone dry, they're ready for long-term storage or to be enjoyed right away. If you’re curious about different ways to use them, our guide to brewing the perfectly brewed shroom tea is a fantastic place to start.
How to Confirm Your Mushrooms Are Perfectly Dry
After hours of patiently waiting, your mushrooms might finally look ready. But looks can be seriously deceiving, and pulling them too soon is one of the most common ways to ruin a perfectly good harvest. Learning how to be absolutely certain they’re dry is a skill you can’t afford to skip when handling Psilocybe cubensis.
The go-to method for checking dryness is a simple, hands-on technique we call the "cracker test." This isn't just a casual tip—it's the gold standard. A perfectly dried mushroom should snap cleanly in half with a distinct, audible crack, just like a saltine cracker or a dry twig.
If it bends, feels soft, or has any flexibility before it breaks, it’s not ready. That little bit of give is a dead giveaway that moisture is still trapped in the mushroom's cell walls. This is a huge risk for mold growth and can cause your precious harvest to lose potency over time. You need them to be completely brittle.
Sensory Cues Beyond the Snap
Besides the cracker test, you can use your other senses to get a feel for how dry they are. A properly dried mushroom should feel almost weightless in your palm. Don’t forget, fresh mushrooms are over 90% water, so a finished one will have lost the vast majority of its original mass.
Pick up a few from the tray. They should feel incredibly light, almost hollow.
Make sure to pay close attention to the thickest parts of the mushroom—this is almost always the stem. Gently squeeze the base of a few of the larger stems between your thumb and index finger. You should feel zero sponginess or give. It needs to feel hard and totally solid, as this is the last place moisture tends to hide.
One of the biggest pitfalls is only testing the smallest, thinnest mushrooms in the batch. They always dry out first. You have to test several of the largest, most dense fruits to make sure the entire harvest is ready for storage.
A Real-World Testing Scenario
Let's say you've got a full dehydrator tray with a mix of small, skinny mushrooms and a few big, chunky ones with fat stems. Here's how to approach it.
- Start with the Smallest: First, grab one of the little guys that looks completely dry. If it snaps cleanly, great! That's a good first sign, but you're not done yet.
- Move to the Largest: Now, find the single biggest, thickest mushroom on that tray. Try to snap its stem right near the base, where it's densest.
- Analyze the Result: Did it bend a little before breaking? Did it feel even slightly leathery? If you got anything other than a clean snap, the whole batch needs more time in the dehydrator. The smaller mushrooms might be done, but you can't store them all together until the big ones are, too.
Only when that largest mushroom passes the cracker test with a satisfying snap can you be confident the drying process is truly finished. This careful final check is what separates a good, storable harvest from a disappointing one.
Long-Term Storage to Maximize Potency
Getting your Psilocybe cubensis perfectly brittle is a huge win, but don't celebrate just yet. The next mission is all about long-term preservation. All that effort can go to waste in just a few weeks if you don’t store them right, so this final step is every bit as critical.
Your storage strategy comes down to fighting three main enemies: oxygen, light, and moisture. Even cracker-dry mushrooms are hygroscopic, which is a fancy way of saying they’ll suck moisture right out of the air if you give them a chance.
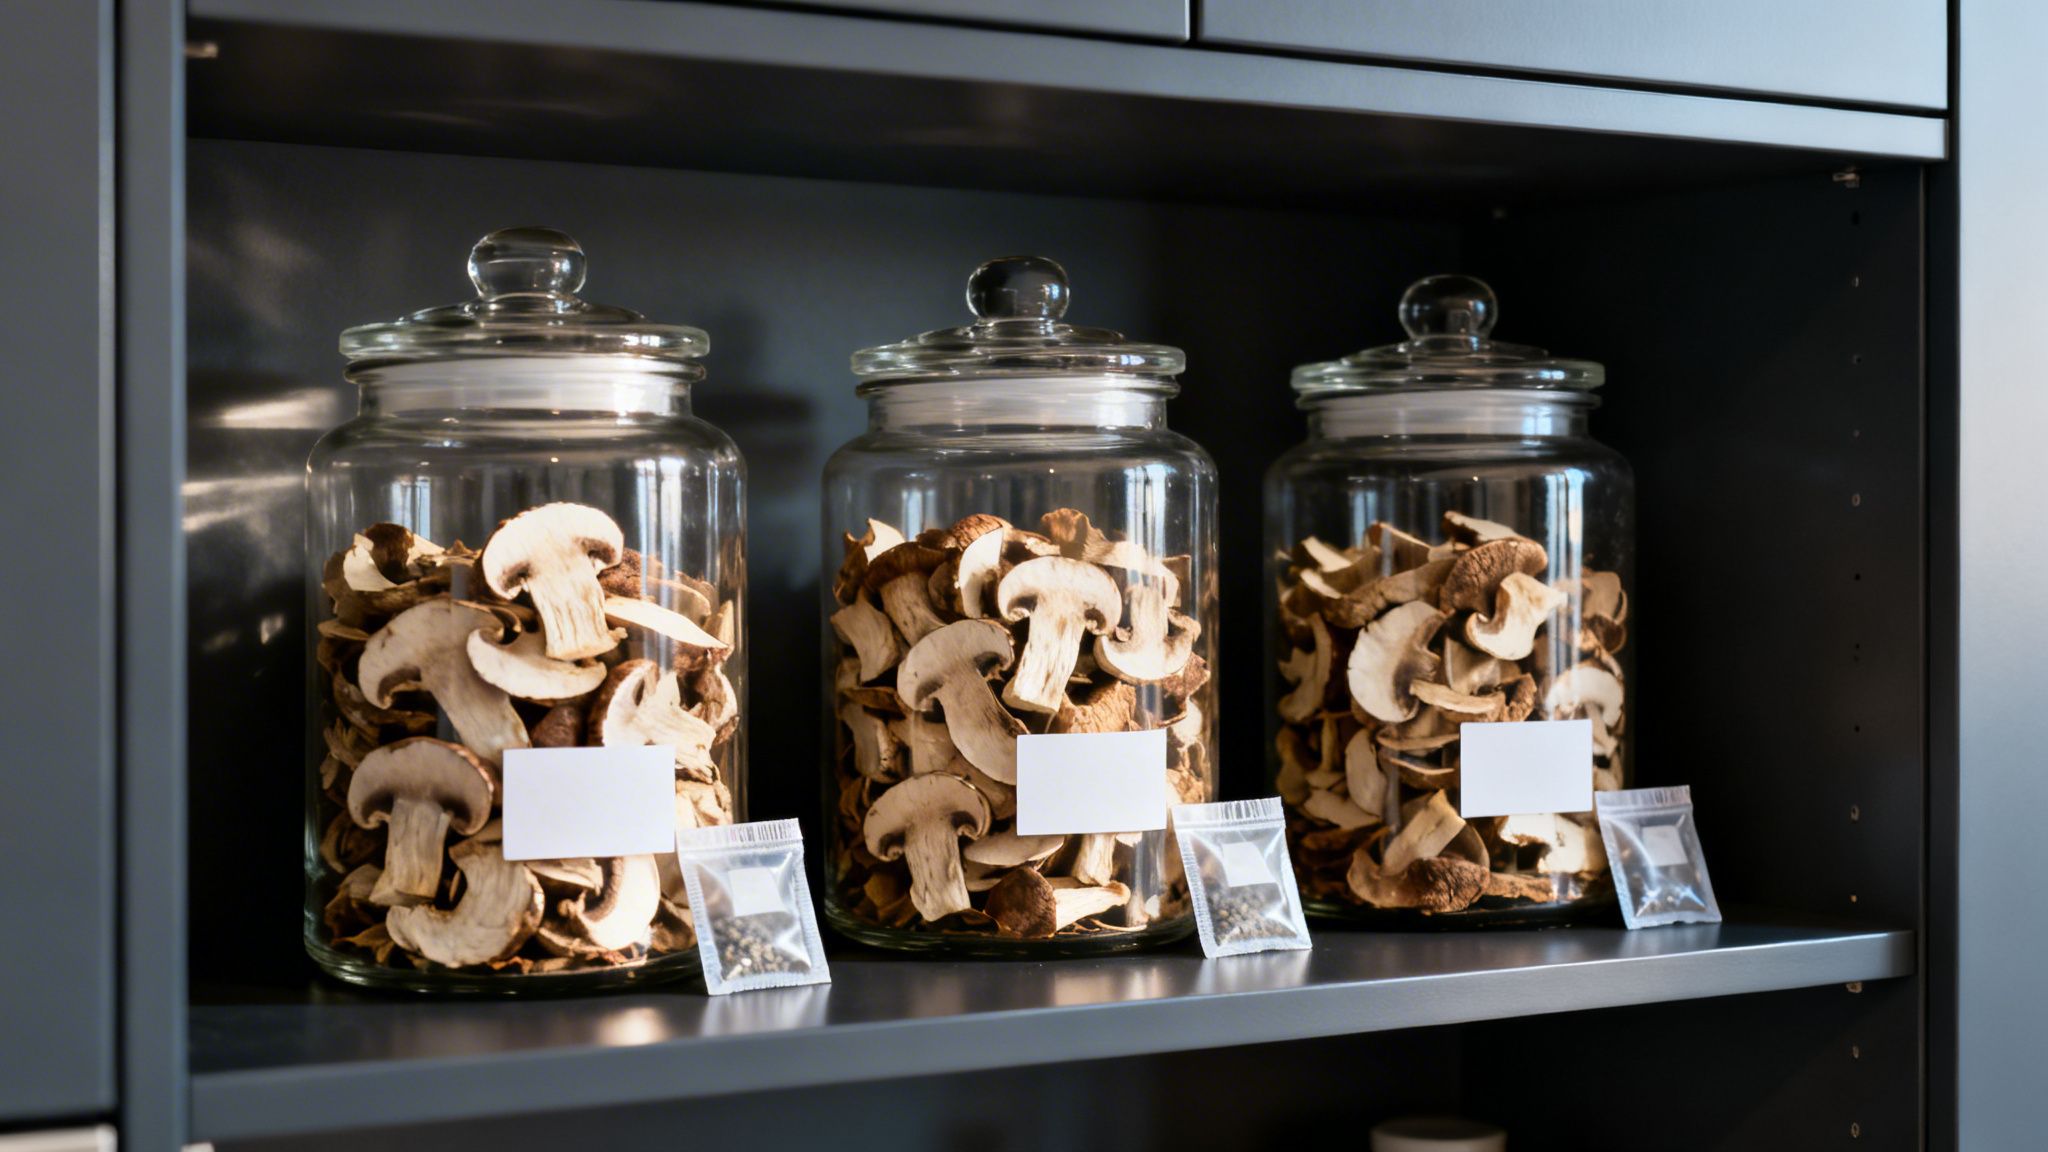
Choosing Your Storage Container
The right container is your first and best line of defense. Forget about plastic baggies—they’re permeable to air and simply won't cut it for long-term protection. Your best bet is a classic glass jar with a genuinely airtight seal.
Mason jars with two-part lids are pretty much perfect for this. That rubber gasket on the lid creates a super-strong seal that locks out air and moisture. Just fill the jars, leave a little bit of room at the top, and tighten the lids down.
Proper storage is about more than just preventing mold; it’s about keeping your mushrooms potent. Mycology literature shows that psilocybin levels drop significantly when mushrooms are stored for over a year, especially if the conditions aren't great. Psilocin, in particular, is extremely fragile. You can explore some great tips on Leafly.com to learn more about extending their shelf life.
The Non-Negotiable Desiccant Pack
This is the one step way too many people skip, and it makes all the difference: adding a desiccant pack. Tossing a food-grade silica gel pack into each jar is your insurance policy against rehydration. These little packets are workhorses, absorbing any leftover moisture in the mushrooms or any air that gets in when you open the jar.
Think of a desiccant pack as a silent guardian. It’s a small, cheap addition that provides an immense amount of protection for your valuable harvest.
You can find them easily online. Just throw one or two in each jar before sealing it up. They’ll keep the inside of your jar bone-dry, guaranteeing your mushrooms stay brittle and potent.
Finding the Perfect Storage Spot
Once your mushrooms are sealed tightly in their jars with a trusty desiccant pack, you just need to find them a home. The rule here is simple: cool, dark, and consistent. A closet, a cabinet, or a drawer that you don’t open often is perfect.
You’ll want to avoid places where the temperature swings, like a garage or an uninsulated attic. Keep them away from heat sources like your router or kitchen appliances, too. Light, especially direct sunlight, is a known killer of active compounds, so darkness is absolutely essential.
The Ultimate Method for Long-Term Storage
If you're aiming to store your harvest for a year or even longer, there's one method that beats all others: vacuum sealing. This technique sucks nearly all the oxygen out of the package, pretty much stopping oxidation in its tracks.
For maximum preservation, you can combine a few methods. Here’s how:
- First, place your cracker-dry mushrooms into a vacuum-sealer bag.
- Next, add a desiccant pack right in there with them.
- Then, vacuum seal the bag, getting as much air out as you can.
- For an extra layer of protection, put the sealed bag inside a Mason jar or a Mylar bag and store it somewhere cool and dark.
This multi-layered approach creates an almost perfect preservation environment. By getting rid of moisture with a desiccant and removing oxygen with a vacuum sealer, you create an inert atmosphere that will keep your mushrooms potent for an incredibly long time. Whether you go with a simple jar or the full vacuum-seal treatment, taking storage seriously is the final act of respect for the mushrooms you’ve cultivated.
Harm Reduction and Legal Considerations
While we've covered the practical steps for drying Psilocybe cubensis, it's just as critical to talk about the world they exist in. Everything in this guide is shared for educational and informational purposes, because knowledge is the first step to safety.
The legal side of things can be a real minefield. Laws around psilocybin mushrooms are a complex patchwork that changes dramatically from one state, or even one city, to the next. It’s on you to know the rules where you live. What might be decriminalized in one town could lead to serious trouble just a few miles away.
For a real-world look at how these regulations can differ, check out our guide on magic mushrooms in Michigan. It's a perfect example of the evolving legal landscape.
Putting Your Safety First
Beyond any laws, your personal safety is what truly matters. If you decide to engage with psilocybin, practicing harm reduction isn't just a good idea—it's essential. Responsible use always starts with being educated.
Think of these as the fundamental rules of the road:
- Start Low, Go Slow: Potency is a wild card. It can vary wildly between different batches, and even from one mushroom to another in the same flush. Always, always begin with a small dose to see how it affects you before even thinking about taking more.
- Mind Your Set and Setting: This is a classic for a reason. Your "set" (your mindset and emotional state) and your "setting" (your physical environment) have a massive impact on your experience. Make sure you’re in a comfortable, familiar place where you feel completely safe and secure.
- Bring in a Sitter: Having a trusted, sober friend with you can be a game-changer. They can offer a reassuring presence, help you through any challenging moments, and just generally make sure you’re doing okay.
In the end, harm reduction is all about making informed choices to minimize potential risks. It empowers you to approach psilocybin with the respect and caution it deserves, helping you create a safer experience for yourself.
Sticking to these principles is the bedrock of a responsible approach. Your best tool for ensuring a positive and safe outcome is education, turning what could be a risky situation into a well-managed and intentional one.
Frequently Asked Questions About Drying Mushrooms
Once you get into drying your own harvest, a few questions always seem to pop up. Whether you’re running into a little trouble or just want to get your technique down perfectly, you need straight answers. Here are some of the most common things people ask, with advice straight from our own experience.
Can I Use an Oven or Microwave to Dry Mushrooms?
We hear this one all the time, and the answer is a hard no. Ovens and microwaves are just too aggressive. They’re built to cook with high, fast heat, which is the absolute worst thing for psilocybin.
Think of it this way: you wouldn't use a blowtorch to dry a delicate flower. The intense, uneven temperatures will completely fry the active compounds, destroying all the potency you worked so hard for. Stick with the low, gentle heat from a food dehydrator or the cool, steady airflow from a fan to get the job done right.
Why Did My Mushrooms Turn Dark Blue or Black?
It can be pretty alarming to see your beautiful mushrooms develop dark blue or even black spots as they dry, but don't panic. In most cases, this is just bruising. It's a simple oxidation reaction that happens when the psilocin inside is exposed to air.
This can happen from handling them, the pressure from the drying rack, or even just as a natural part of the process. While it might look a little dramatic, it doesn't mean your mushrooms have been compromised or lost significant potency.
Important Distinction: Bruising looks like blue or blackish stains on the mushroom itself. Mold, on the other hand, is your enemy. It’s typically fuzzy, can be white, green, or black, and is a clear sign that moisture got the best of them. If you see fuzz, toss it.
How Long Do Properly Stored Mushrooms Last?
When you get your mushrooms "cracker dry" and store them the right way, they can hold onto their magic for a surprisingly long time. Tucked away in an airtight glass jar with a desiccant pack and kept in a cool, dark place, they’ll easily last for well over a year.
If you really want to go the extra mile, vacuum sealing them can extend that shelf life even longer. Potency will always decline a tiny bit over time, but keeping oxygen, light, and moisture away slows that process to a crawl.
Is It Better to Store Them Whole or as a Powder?
For anyone thinking about long-term storage, keeping them whole is always the way to go. Grinding mushrooms into a powder dramatically increases the surface area, which means way more of the good stuff gets exposed to oxygen. This speeds up the degradation process like you wouldn't believe.
The best practice is simple: keep your mushrooms whole until you're ready to use them. Grinding them up right before you need them ensures you’re getting the most out of your perfectly preserved harvest.
Ready to explore a curated selection of premium products? From classic dried strains to delicious edibles, Metro Mush offers convenient delivery across the Detroit and Ann Arbor areas. Check out our menu and place your order today at https://metromush.com.